Reviving the Green
Introduction
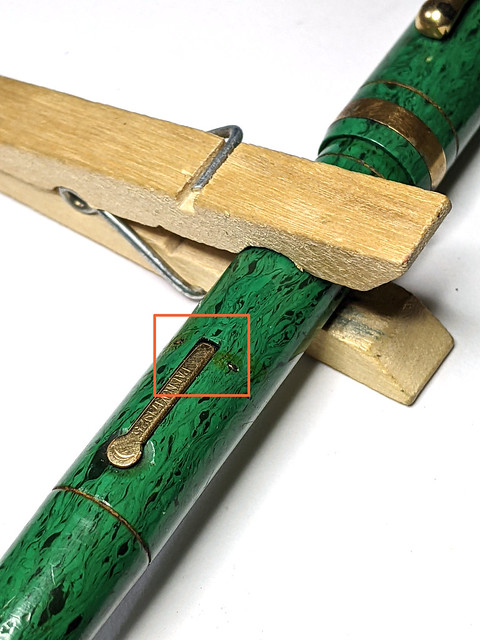
This pen needs no introduction to those who like vintage pens, but for those are not yet familiar, it is a 1930s Conklin Endura in Verde celluloid color.

The "verde" or green, came in many different shades. I've seen some that has very light, pistachio green, to this one, which is darker.
This pen also came to my workbench with two major problems:
- The tines are on the verge of divorce. I don't have the photo showing that unfortunately, so you just have to take my word for it. If you look at the nib from the top (where you can read the engraving and the tines pointing up), the tip of the right tine was about 1mm above the left one. That's how messed up the nib was.
- The lever slides up and down its place in the barrel. Fortunately, the Conklin lever fillers were top notch and does not rely on a C ring sitting in a groove inside the barrel, instead, it hinges on a tiny pin that can be replaced. Unfortunately, replacing it is tricky. Read on.
The Nib
Even just by looking at the nib, I knew that I won't be able to re-align the tines without taking the nib off the feed/section. So, I proceeded to take the section off the barrel. I've seen stubborn sections and this one belongs to the upper echelon of that group.
Heating the barrel repeatedly, I wiggled the section apart from the barrel, managing probably 0.1mm at a time. But thankfully all that effort wasn't in vain because I separated the section eventually without any damage on the barrel.
Knocking the nib out was a breeze and now, I can fix the tines.
Having done this a lot, one thing to keep in mind, that is to go slow, and by slow, I mean really slow. Vintage gold nibs such as this 14K Conklin Endura are resilient, but they need to be corrected a little bit at a time. This is where fingers that have been doing this a lot, will have the muscle memory pull this off.
Again, I apologize for the lack of the before picture, but as you can see above, the right tine is now together again with the left one (that's why I was able to sketch with it).
One divorce averted.
The Lever
Now, it's time to repair the lever. Interestingly, a few months ago, I scored a rather uncommon Spencerian pen which has a super cool clip shaped like a quill. It was also made by Conklin, and it exhibit the exact same issue with the lever.
Apparently, the pin that holds the lever are -- over the decades -- often missing or broken off on these darling pens. And thanks to restoring this pen, I now know exactly what to do for the Spencerian.

First step: The New Pin
The new pin is going to be cut out of a length of a steel piano wire. The wire looks tiny and malleable, but when it's short, it's rigid and strong.
So get your wire out, and cut it like in the picture. I forgot which gauge this one is, but I've had it for a long time and it always fit Conklin or other lever mechanism that are pinned down (ha!).

 Now clear out the debris on the other side of the barrel, and hopefully I can thread the wire through.

 Last but not least, the wire needs to be sealed and hold in place. I use two small dabs of shellac to cover the ends of the wire. This accomplished two things.

Note to self, remember to take it to the hobby store to purchase another length once this one is too short.
Second step: The Lever
Try to clear out the debris and broken parts from the old pin off the lever first. The lever is metal and it's thin, I'm not saying that it's easy or trivial, but it's a heck better than the next part, clearing out the holes on the barrel.
The picture above is what it should look like once you found and clear the holes on the lever.
Third Step: The Barrel
Now we can proceed to clear the holes on the barrel. Because the barrel is thicker than the metal on the lever, it can take some time to clear out the debris. To add to the challenge, the holes are tiny, and there isn't a clear line of sight that you can use to gauge where you should poke your wire to clear the decades of debris.
NOTE: When restoring vintage pens like this, it is important to consider the risk of breakage. Example, if you accidentally gouge the barrel, or chip the hole off (done that before), it's game over, you can't go to a store and order another barrel.
Here's what it looks like when one side of the barrel hole was cleared out.
Now, for me, one of the fun parts in vintage restoration is to come up with "homemade" solutions to the issues that came up during the restoration.
So, it's worth it to take some time to talk about the tools that you see in this photo.
The ridges on the bent nose plier is the key to be able to hold the little pin so it won't wiggle around when it's being used to clear out the debris.
The little jig, a.k.a the twin clothespins hold the barrel steady as I try to find the right angle to clear the debris by tapping on the wire held by the plier.
And I did. Pity that this picture only shows when it's done as it was more challenging than the first hole. And notice the jig is now lying on the surface, which provided a more stable support.
After about an hour of trials and errors (with two tea breaks), I was able to clear the holes and thread the wire on the barrel.
Fourth Step: Trim and Seal
Now that the wire is pinning the lever securely in its place, we need to trim it.
I use my tiny rotary tool to cut the extra wire and then grind the protruding parts.
One, it holds the ends so the wire in place, so it won't accidentally move or got knocked out if the pen fell or got bumped.
Two, it prevents debris and moisture from entering the holes. Obviously they can still enter through the large cavity when the lever is operated, but hey, if we can do small things to continue the preservation of this old beauty, I'd say let's do it.
Epilogue
For those who have never restored a vintage pen, this write-up may seem superfluous. I mean, what is so difficult about threading a pin across four holes?
The "difficulty" lies more on the fact that I appreciate these old pens so much, that I don't just bludgeon my way through the issues. I took the necessary precautions and move as slow as I needed to be because I know that these pens are -- in a small way -- a treasure from the past. Something that is worth my time to care for. And that's why I took the time to document the restoration.
So there you have it. Now the Endura Standard "Verde" has a new lease on life thanks to the new pin which makes operating the lever possible, just like 90+ years old ago when this pen rolled out of the assembly line in Toledo, Ohio, USA.
Comments
Post a Comment